Learn the essential steps and techniques for safely and accurately cutting Plexiglass with our comprehensive guide on how to cut Plexiglass. Mastering the art of cutting plexiglass is a valuable skill for DIY enthusiasts and professionals alike. Whether you’re working on a home improvement project or creating intricate designs, knowing how to cut plexiglass properly is essential.
In this guide, we will explore various techniques and tools to achieve clean and precise cuts, ensuring that your projects turn out as planned. From scoring and snapping to using power tools like saws and routers, we’ll cover everything you need to know to master the art of cutting plexiglass effectively and safely. So, let’s dive in and learn how to cut plexiglass like a pro.
Understanding Plexiglass
Before we dive into cutting techniques, let’s first understand what plexiglass is and its characteristics. Plexiglass is a type of thermoplastic acrylic resin that resembles glass but is much stronger and more lightweight. It’s available in different thicknesses and can be clear, colored, or frosted. Plexiglass is commonly used in windows, signage, aquariums, and even furniture. Learn how to cut plexiglass effectively with this guide, especially useful for crafting countertops or other home improvement projects.

Safety Precautions
Safety should always be a top priority when working with plexiglass or any other type of material. Here are some essential safety precautions to keep in mind:
Wear protective gear

Always wear safety goggles, gloves, and a dust mask to protect your eyes, hands, and respiratory system from debris and fumes. Wearing protective gear is essential for ensuring safety in various environments, whether at work, during sports, or in hazardous conditions. Protective gear, such as helmets, gloves, goggles, and masks, is designed to shield you from potential injuries, harmful substances, and other risks.
By donning the appropriate protective equipment, you significantly reduce the likelihood of accidents and health issues, allowing you to perform tasks more confidently and effectively. Prioritizing your safety by wearing protective gear is a simple yet crucial step in safeguarding your well-being.
Work in a well-ventilated area

Cutting plexiglass can produce dust and fumes, so it’s essential to work in a well-ventilated space or wear a respirator. When cutting plexiglass, it’s essential to work in a well-ventilated area. This ensures that any dust or fumes generated during the cutting process are quickly dissipated, reducing the risk of inhalation and maintaining a safer environment.
Proper ventilation helps keep the workspace clear, providing better visibility and reducing potential hazards associated with the fine particles released from the plexiglass. Additionally, a well-ventilated area can prevent the accumulation of static electricity, which can attract dust and debris to the cutting surface, ensuring a cleaner and more precise cut.
Use proper tools

Make sure you have the right tools for the job, such as a plexiglass cutter, saw, or router, and familiarize yourself with their operation before use. When learning how to cut plexiglass, it is crucial to use proper tools to achieve clean, precise cuts and avoid damaging the material.
A fine-toothed saw, utility knife, or a specialized plexiglass cutter can be used depending on the thickness of the plexiglass. Ensuring that the tools are sharp and well-maintained will prevent cracks and uneven edges. Additionally, using clamps to secure the plexiglass during cutting and wearing protective gear like safety glasses and gloves can enhance safety and accuracy in your project.
How to Cut Plexiglass Cutting Techniques
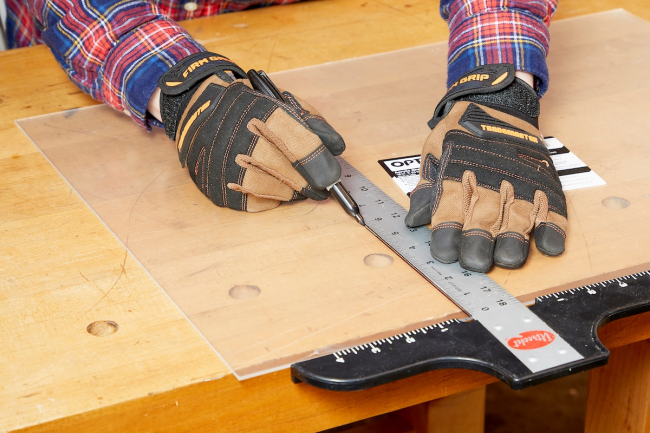
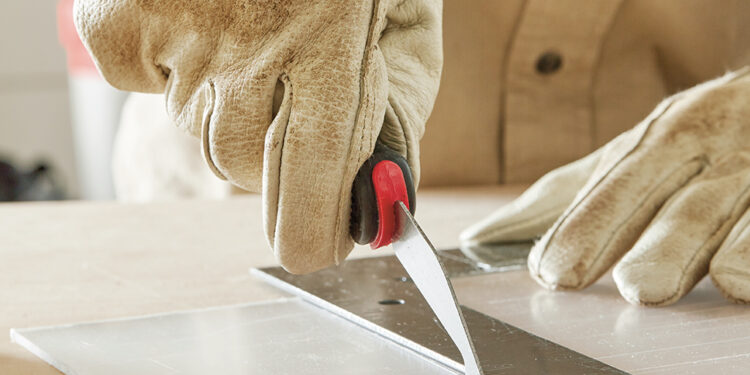
Cutting plexiglass can be a straightforward process when you use the right techniques and tools. Start by measuring and marking the plexiglass accurately with a grease pencil or a permanent marker to ensure precise cuts. For straight cuts, a scoring tool or a utility knife can be used to score along the marked line repeatedly until a deep groove is formed. Once scored, the plexiglass can be snapped over the edge of a table or a workbench. For more intricate cuts, a jigsaw or a circular saw equipped with a fine-toothed blade specifically designed for plastics will provide cleaner and more controlled cuts.
Always secure the plexiglass firmly to prevent shifting during cutting, and use a slow, steady motion to avoid chipping or cracking the material. Additionally, wearing safety goggles and gloves is essential to protect yourself from any splinters or shards. By following these techniques, you can achieve smooth, precise cuts in plexiglass, making it a versatile material for various projects. There are several techniques for cutting plexiglass, depending on the thickness and complexity of the cut. Here are some common methods:
Scoring and Snapping
Place the plexiglass sheet on a flat surface and measure and mark the cut line using a ruler and a permanent marker. Use a plexiglass cutter or utility knife to score along the marked line, applying firm pressure but not cutting all the way through. Once scored, carefully bend the plexiglass along the scored line, applying even pressure until it snaps cleanly.
Sawing
For straight cuts or more precise shapes, a saw is the preferred tool. Use a fine-toothed saw blade, such as a jigsaw or circular saw with a carbide-tipped blade, to prevent chipping or melting. Clamp the plexiglass securely to a workbench or table, and use a straight edge or guide to ensure straight cuts. Learn the intricate art of shaping plexiglass with precision by following a comprehensive guide on how to cut plexiglass effectively and safely.
Routing
For curved or intricate cuts, a router equipped with a carbide-tipped cutting bit is ideal. Secure the plexiglass sheet to a work surface using clamps or a router table, and attach a template or guide to follow the desired cut pattern. Carefully guide the router along the template, moving at a steady pace to prevent overheating and melting.
Finishing Touches
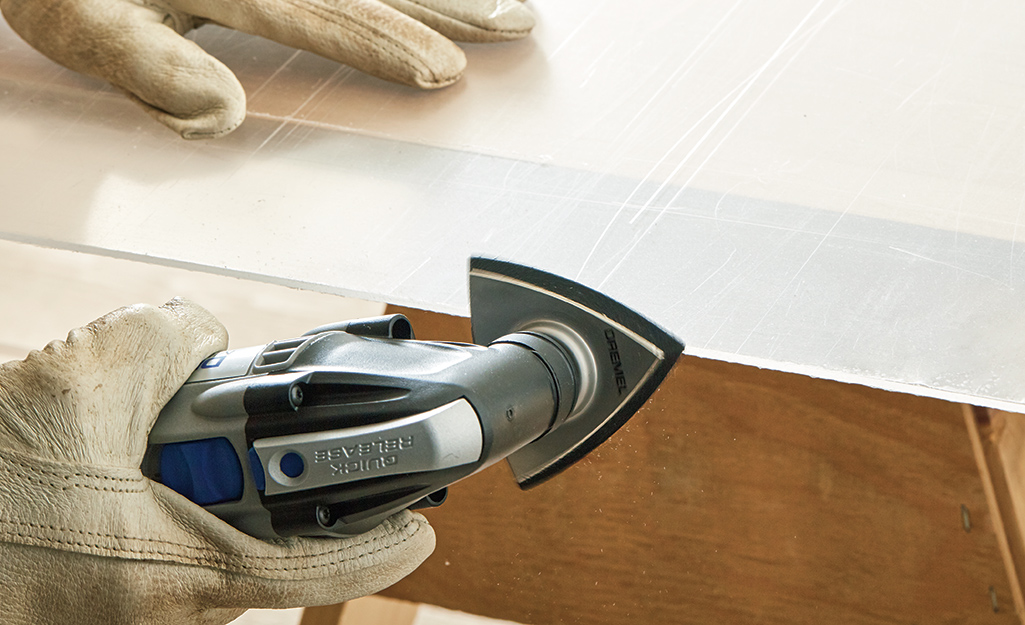
Once you’ve cut the plexiglass to size, you may need to smooth the edges and remove any rough spots. You can use sandpaper or a sanding block to gently sand the edges until smooth, taking care not to apply too much pressure to avoid scratching the surface. When it comes to cutting plexiglass, the finishing touches are crucial for achieving a professional and polished look.
After making your initial cuts, use fine-grit sandpaper or a specialized plexiglass scraper to smooth any rough edges. This step helps to eliminate sharpness and potential hazards, ensuring the edges are safe to handle. For an even more refined finish, consider using a flame polisher, which can gently melt and smooth the edges, giving your plexiglass a crystal-clear, polished appearance. Taking the time to perfect these finishing touches will enhance the overall quality and aesthetics of your plexiglass project.
Conclusion
Mastering the art of cutting plexiglass requires practice, patience, and the right tools and techniques. By following the guidelines outlined in this guide and taking appropriate safety precautions, you can confidently tackle plexiglass cutting projects with ease. Whether you’re a DIY enthusiast or a professional, knowing how to cut plexiglass effectively will open up a world of possibilities for your creative endeavors.


