
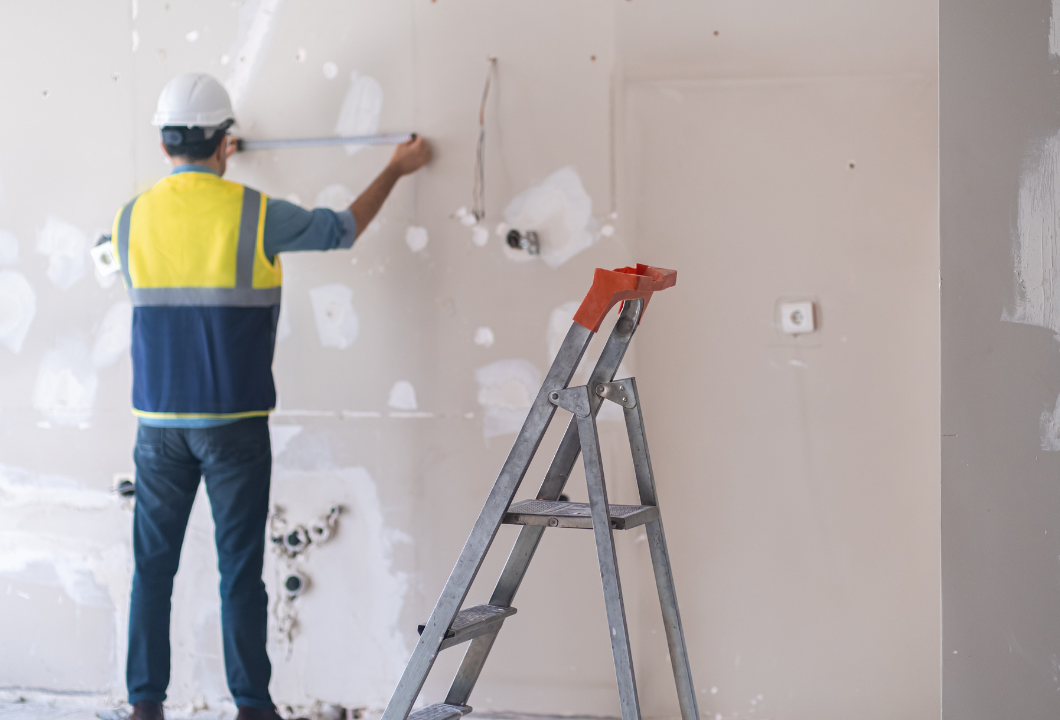
You come across it every day, whether it’s in your home, office, or any store you visit. It goes by different names like Sheetrock, wallboard, plasterboard, gypsum board, or most commonly, drywall. Even though drywall is everywhere, not many people know how it’s made, where it comes from, or just how useful it really is. Whether it’s a small patch or a major fix, drywall repair is an easy DIY project with the right tools and materials.
Drywall is a material used to build walls and ceilings. It’s also used for design features like arches and eaves, adding style to spaces. It’s easy to install, super durable, and simple to fix if it gets damaged. In commercial buildings, drywall is often used to cover columns and steel beams, and it’s an affordable way to finish off walls above ceilings. It also helps make walls and ceilings fire-resistant, slowing down the spread of fire so people can safely evacuate during an emergency.
Table of Contents
What is Drywall?
Drywall is a material used to build walls and ceilings inside homes and buildings. You might also hear it called gypsum board or plasterboard. It’s made of a soft mineral called gypsum, which is sandwiched between two thick layers of paper.
People love using drywall because it’s easy to install, affordable, and even helps slow down fires. It comes in big sheets that can be cut to fit any space and is attached to a frame using screws or nails. Once it’s up, drywall has a smooth surface that you can paint, wallpaper, or decorate however you like.
Some types of drywall can also help block sound, and special moisture-resistant drywall is used in places like bathrooms to prevent damage from water. Over time, drywall can get dents, holes, or water damage, but it’s easy to fix, which is why drywall repair is a common part of home maintenance.
Also Read about: Causes of cracks in ceiling : when to worry and how to fix it
How to Pick the Best Tools for Drywall Fixes and Painting?
When repairing drywall and getting ready to paint, having the right tools makes the job much easier. The two most important tools you’ll need are a putty knife and a sanding sponge. A putty knife helps you spread spackle or joint compound to fill in any holes or cracks, making the surface smooth. Once it dries, a sanding sponge helps even out any rough spots so your wall looks flawless. With these simple tools, you can fix up your walls and get them ready for a fresh coat of paint without any hassle!
A sanding sponge is super helpful for smoothing out rough spots or extra dried compound after fixing a wall. It gently evens out the surface so the repaired area blends in nicely with the rest of the wall. This makes a big difference when it comes to getting a smooth, clean finish before painting. With a putty knife to apply the spackle and a sanding sponge to smooth things out, you’ll have everything you need to fix up your walls with confidence. These simple tools make drywall repairs easy and help your walls look fresh and flawless!
How to Get a Smooth, Flawless Finish?
If you want your wall to look perfect after painting, you need to prepare it the right way. Here are some simple steps to follow for drywall repair and painting:
1) Smooth it out – Lightly sand the damaged area so the new paint goes on evenly.
2) Fill the gaps – Use spackle to cover any cracks or holes. Spread it smoothly with a putty knife.
3) Let it dry – Give the spackle enough time to dry completely before sanding it down so it blends with the rest of the wall.
4) Clean up – Wipe away any dust from sanding to make sure the paint sticks properly.
Taking these extra steps will help you get a clean, professional-looking finish!
How to Patch Holes and Cracks Like a Pro
Fixing holes and cracks in drywall is an important step to getting a smooth, professional-looking wall. Before painting, it’s important to patch up any damage properly so the final result looks flawless.
Start by cleaning around the hole or crack, removing any loose bits or old filler. Then, use a putty knife to spread joint compound over the damaged area, smoothing it out so it blends with the wall. Let it dry completely before sanding it down to make it even.
For bigger holes, you can use self-adhesive mesh tape to make the repair stronger. Once everything is smooth, apply a coat of primer before painting to help the paint stick better and blend seamlessly. By following these simple steps, your drywall repairs will be practically invisible, leaving your walls looking as good as new!
Expert Tips for Flawless Drywall Finishes
1) Using a Self-Priming Filler
If you’re fixing up a wall with regular patching materials, you’ll need to add a special primer before painting. If you skip this step, the patched areas might look a little cloudy or stand out once the paint dries. But here’s an easier option—use a self-priming patching material! This kind already has primer mixed in, so you don’t have to do that extra step. Just check the label for words like “self-priming” or “with primer” when you’re buying it. It’ll save you time and make sure your paint job looks smooth and even.
2) Use Setting Compound to Patch Large Holes
If you’re fixing small holes or dents in your wall, regular patching compound works just fine. But if the hole is bigger than a dime or deep, it’s better to use a special type of joint compound that hardens through a chemical reaction. This type comes in powder form, and you can choose different setting times, anywhere from five minutes to 90 minutes. Once you mix it with water, the clock starts ticking, and it will harden within the time listed on the package.
The five-minute version is super handy because you can buy it in a small 5-pound box, and it dries fast, letting you apply another coat quickly. Just keep in mind that this type of compound is tougher to sand than regular patching materials. So, when you apply it, try to smooth it out so it’s level with the wall—that way, you won’t have to do a ton of sanding later. You can find this compound at any store that sells drywall taping supplies.
3) Indent the Area for Better Patching
When you take out a nail, drywall anchor, or picture hanger, you’ll often notice a little bump of old paint or drywall sticking out. That can make it tricky to get a smooth patch. The trick? Instead of just trying to cover the bump, you want to create a small dent first—then fill it in.
A lot of good putty knives have a rounded end on the handle (usually plastic or brass), which is perfect for this. If you don’t have one, the handle of a screwdriver or utility knife works too. Just press it against the hole, give it a little twist while pushing down, and you’ll create a nice dent. If you’re feeling confident, you can even tap it like a hammer. Once you’ve got that dent, filling it in becomes much easier, and you’ll end up with a smooth, flawless finish.
4) Fix Cracks Fast with Repair Spray
Cracks around windows and doors are pretty common, and they usually happen because the framing shifts over time. Unfortunately, these kinds of cracks are tough to fix for good. But there’s a way to make your repair last longer—using a spray-on crack repair product. This spray creates a flexible layer over the crack, so as your house moves slightly, the repair can stretch instead of breaking again.
If the crack is wide open, start by filling it with a patching compound. Once that’s dry, grab your crack-repair spray and follow the instructions on the can to cover the area. After it dries, just paint over it, and you’re done! You can find this spray at most hardware or paint stores, or even order it online.
5) Complete a Row of Holes with Just One Swipe
When pros work on drywall, they don’t fill each screw hole one by one. Instead, they spread a long, smooth stripe of joint compound over the entire row of holes. This method isn’t just faster—it also makes the patch blend in better and makes sanding way easier. Instead of carefully sanding around every single hole, you can just smooth out the whole strip in one go. You can use this trick anytime you need to fill a bunch of holes that are close together, like where a shelf used to be or a row of picture hooks. Just grab a 6-inch putty knife and spread the compound evenly over the area.
6) Skim-Coat Damaged Areas for a Flawless Finish
If your mudroom walls are covered in dents and dings from boots, hockey sticks, and golf bags, don’t waste time filling each little hole one by one. Instead, grab a wider putty knife—about 6 inches should do—and spread a thin layer of joint compound over the entire area. The best kinds to use are “topping” or “all-purpose” joint compound.
To make it easier to spread, mix in a little water—about a tablespoon or two per three to four cups of compound. Then, scoop some into a drywall pan, grab your putty knife, and start spreading. Apply a thin layer over the damaged area, then scrape off the excess, leaving just enough to fill the holes and dents. You might need to do two or three coats to get everything smooth, but since each layer dries quickly, it won’t take too long. Once the final coat is dry, give the wall a quick sanding to finish it off.
7) Protect Drywall Paper Before Fixing Damage
Alright, here’s the deal—when you pull off old sticky picture hangers or adhesive strips, they often rip off the top layer of your drywall, leaving behind a rough, fuzzy brown spot. If you try to patch it up right away, the moisture from the patching compound will make the paper bubble up, turning a small problem into a bigger mess.
The trick is to seal the damaged area first. Use an oil-based or shellac-based primer (like KILZ Original or BIN) to lock everything in place. You can find these in spray cans or as a liquid you can brush on. Just avoid water-based sealers—they’ll make the bubbling worse.
Once the primer dries, lightly sand the area to smooth out any rough bits. Then, apply your patching compound like you normally would for any wall repair. That’s it! Smooth walls, no fuss.
8) Patch Up Midsize Holes with Stick-On Patches
If you’ve got a doorknob-sized hole in your wall, don’t worry—fixing it is easier than you think! There are a bunch of ways to do it, but the fastest and simplest method is to use a stick-on mesh patch. You can find these at most paint stores, hardware shops, or home improvement centers, and they come in different sizes.
Here’s how you do it: First, clean the wall around the hole and lightly sand it so the patch sticks better. Then, peel and stick the patch right over the hole. Next, spread two or three thin layers of joint compound over it, letting each layer dry before adding the next. If you want to speed things up, use a setting-type compound for the first layer—it dries faster. Once it’s all dry, sand it smooth, paint over it, and your wall will look as good as new!
9) Give Your Walls Texture with a Spray
If you’ve got orange peel texture on your walls or ceiling, it’s great for hiding imperfections and adding a little character. But if you ever need to patch a big spot, matching that texture can be tricky. The good news? You don’t need a pro to fix it! There’s a spray-on orange peel patch you can buy that helps blend the new patch with the existing texture.
These sprays come in different types—regular, quick-drying, and pro. The pro version gives you the most control over how the texture sprays on, so it’s a good choice if you want to get it just right.
Before you start spraying the actual patch, do a test run on a piece of scrap drywall or cardboard. This helps you get the technique down and see how the texture looks once it dries. If the texture doesn’t match perfectly, you can adjust the nozzle for a finer or rougher finish. And don’t stress—if the first layer looks too light, you can always add another coat after it dries!
10) Fix Wall Imperfections with a Raking Light
Before you start painting, grab a bright light and angle it so it shines across the wall from the side. This helps highlight any dents, bumps, or rough spots that you might not see otherwise. When the light hits at an angle, imperfections will stand out, making it easier to fix them before you paint. You’ll be able to spot areas that need more filler or sanding, so your walls turn out super smooth. If everything looks good under this light, then you know your walls will look flawless once the paint is on. It’s a simple trick that makes a big difference!
Conclusion
Drywall is a big part of most homes and buildings. It’s strong and useful, but sometimes it needs a little fixing up. Whether you’re patching small holes, smoothing out rough spots, or getting ready to paint, using the right tools and techniques can make the job much easier. Simple tricks—like shining a light to spot imperfections or picking the right patching material—can help you get a smooth, flawless finish. With a little patience and the right approach, you can keep your walls looking fresh, clean, and as good as new!


